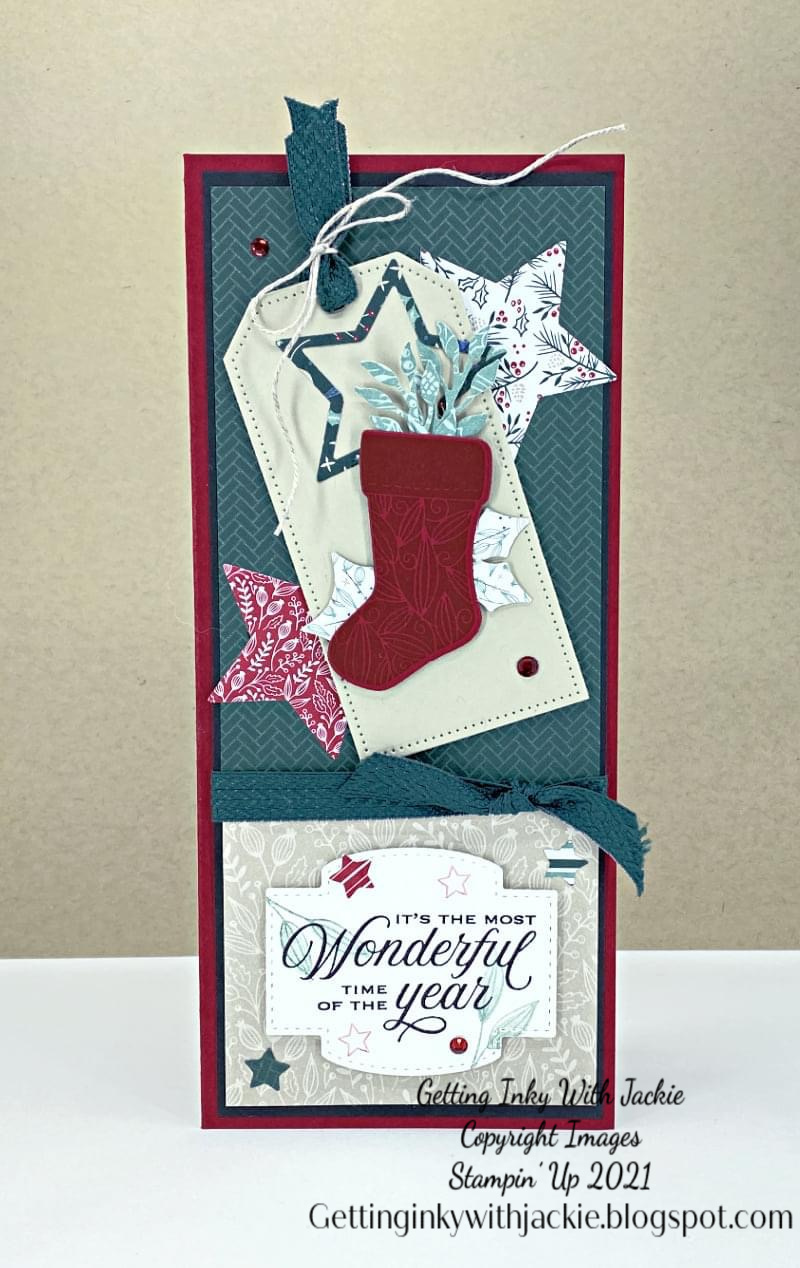
It's Christmas! in July. 😁 I'm loving this Christmas set from the annual catalog. Check out this beautiful card.
Cutting & Scoring:
- Cherry Cobbler 7" x 8" score at 3 1/2"
- Basic Black 3 1/4" x 7 3/4"
- DSP 3 1/8" x 5", 3 1/8" x 2 1/2", scraps
- Basic White 3 1/4" x 7 3/4", scrap
- Sahara Sand Scrap
Instructions:
- Die cut your layers from scraps of DSP of your choice: 2 medium stars, medium star outline (add the detailed medium star to the inside of the solid medium star before die cutting), 4 holly leaves, 2 sprigs, and 3 small stars. Die cut largest Tailor Made Tag from Sahara Sand scrap.
- Stamp stocking in Cherry Cobbler on scrap of Cherry Cobbler and die cut.
- Stamp sentiment on Basic White in Stazon ink. Die cut with second largest label from Stitched So Sweetly label. Stamp leaves in Evening Evergreen (stamp off twice for outline and three times for solid leaf). Stamp small star outline in Cherry Cobbler (stamp off twice).
- Fold and burnish card base.
- Adhere larger DSP layer to one end of Basic Black layer. Adhere smaller layer to other end. Add a piece of ribbon over the seam and attach end on back of layer using scotch tape. Tie a small piece of ribbon to create a knot.
- Feed a piece through hole in tag. Tie a bow around ribbon with Linen Thread. Attach tag to top of larger DSP layer with dimensionals.
- Attach sentiment to bottom layer of DSP with dimensionals.
- Arrange all the die cuts and attach with adhesive, mini glue dots, and dimensionals.
- Embellish with Holiday Rhinestones.
- Decorate Basic White inside layer as you like and adhere to inside of card.
Product List


")


 Designer Series Paper")


 Crinkled Seam Binding Ribbon")


")

")
 Designer Series Paper")


 Chevron Weave Ribbon")


")


